How to migrate from Airtable to a real database app
If you've decided your Airtable base has quietly become real software, the move off it is smaller than it feels. You don't rebuild anything by hand — you bring your data across and describe the app around it. Here's the actual path, step by step.
This is a how-to, not a sales pitch. If you're still weighing whether to switch — the trade-offs, what you gain and give up — that's a different question, and we cover it on the Airtable alternative page. This post assumes you've decided, and you want to know what moving actually involves. Short version: export, describe, import. Most of the work is deciding what you want, not wiring it up.
Before you move: decide what's actually an app
Not every Airtable base needs to move. Some are genuinely just flexible grids, and that's fine. The ones worth migrating are the bases that have quietly become software — several linked tables, rules you've encoded in formulas and automations, views you rebuild for different people, a per-base API something depends on. That's an internal tool wearing a spreadsheet costume, and it's exactly what a database app is for.
So start by listing the tables that belong together as one system — say clients, projects, and invoices — and how they relate. You don't need a schema diagram; a sentence like "a project belongs to a client, an invoice belongs to a project" is enough. You'll hand that sentence to Snill in Step 2.
Step 1 — Export your Airtable base to CSV
In Airtable, export each table you're moving to CSV (one file per table). This is the format that travels cleanly between tools — plain rows and columns, no lock-in. Keep the column headers clear and consistent — they'll map cleanly onto the fields you define in the next step, which makes the import faster.
Step 2 — Describe the app around your data
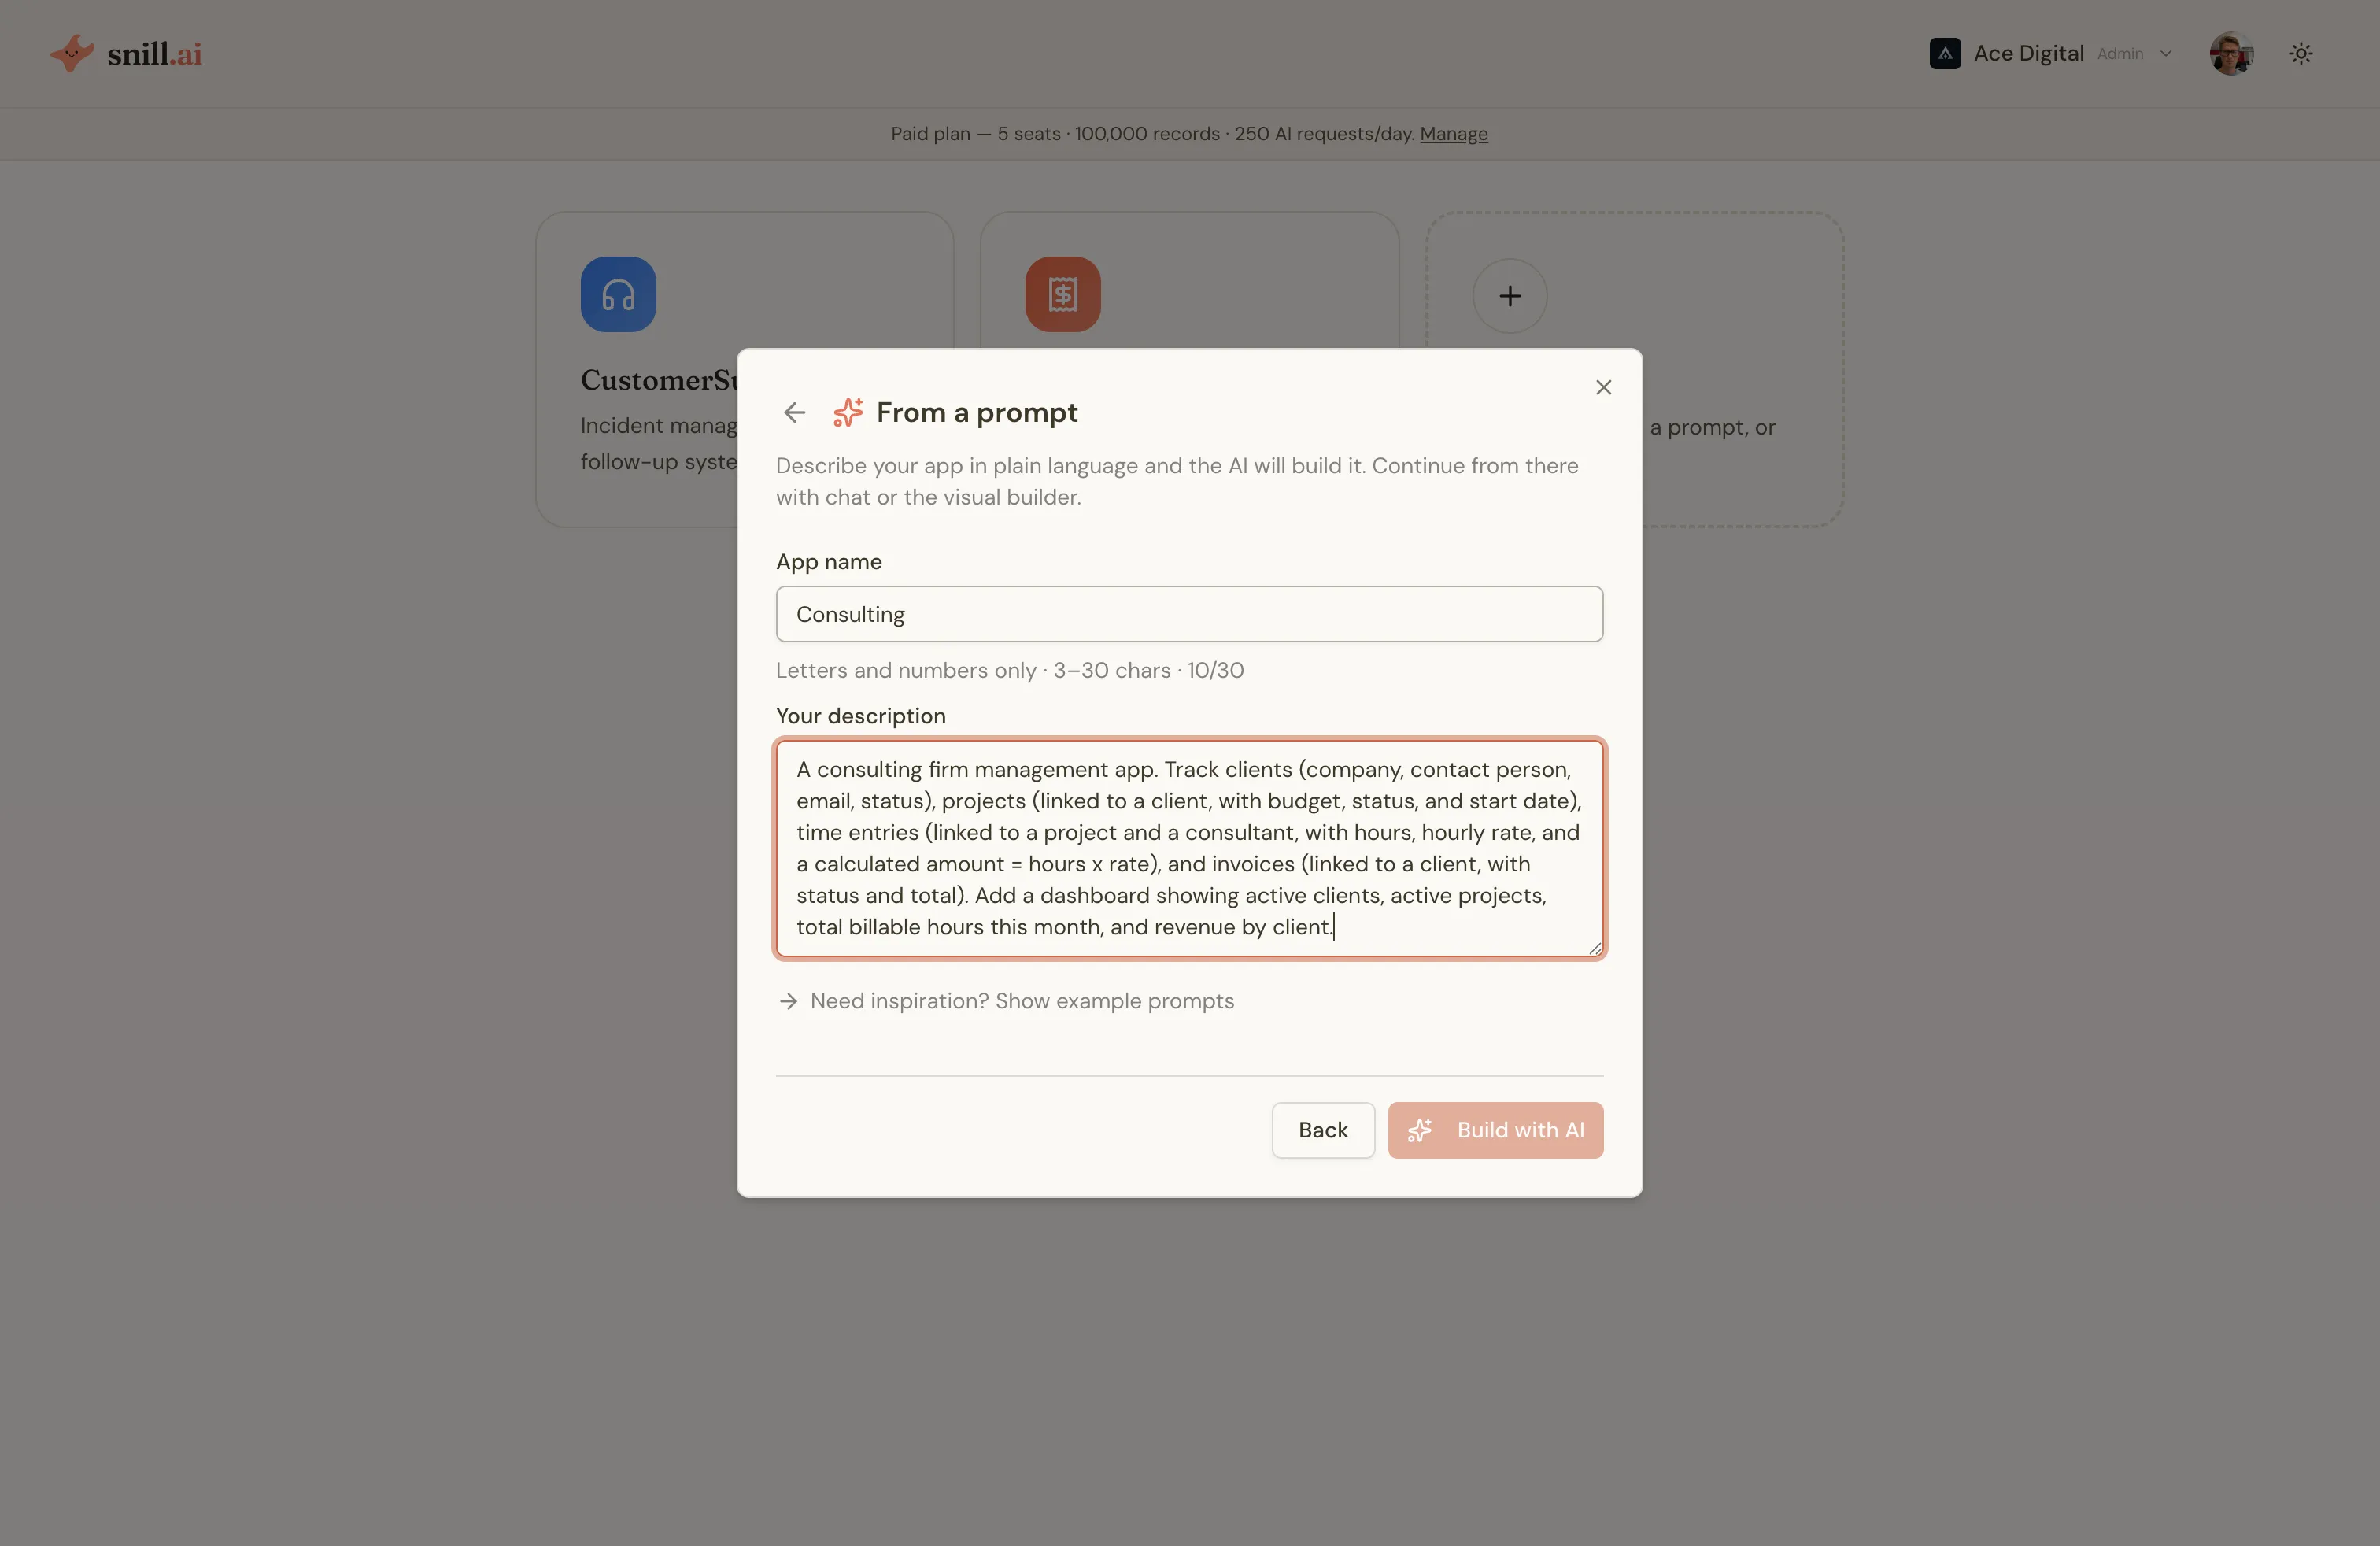
Before any records can come in, the app needs somewhere to put them — so describe it first, and Snill creates the collections your CSVs will land in. This is where the models diverge: in Airtable you'd start wiring link fields, views, automations, an interface. In Snill you describe it.
Tell the assistant how the tables relate — "a project belongs to a client; an invoice belongs to a project" — and it creates the collections and their relationships, so renaming a client once updates every project and invoice that references it. Describe the logic you'd encoded in formulas and automations — "total is hours × rate", "flag invoices unpaid after 30 days" — and it becomes calculated fields, workflows, and scheduled rules, enforced on the server, not just in a view.
Step 3 — Import your data into those collections
With the collections in place, import each CSV into the one it belongs to. The wizard maps your file's columns onto the fields you just defined and handles type coercion — text that's really a number or a date is converted, and if a column holds values that aren't in a dropdown yet, it can extend the option list to fit your data. (See import & export in the docs.) You're not rekeying months of records — they come straight across.
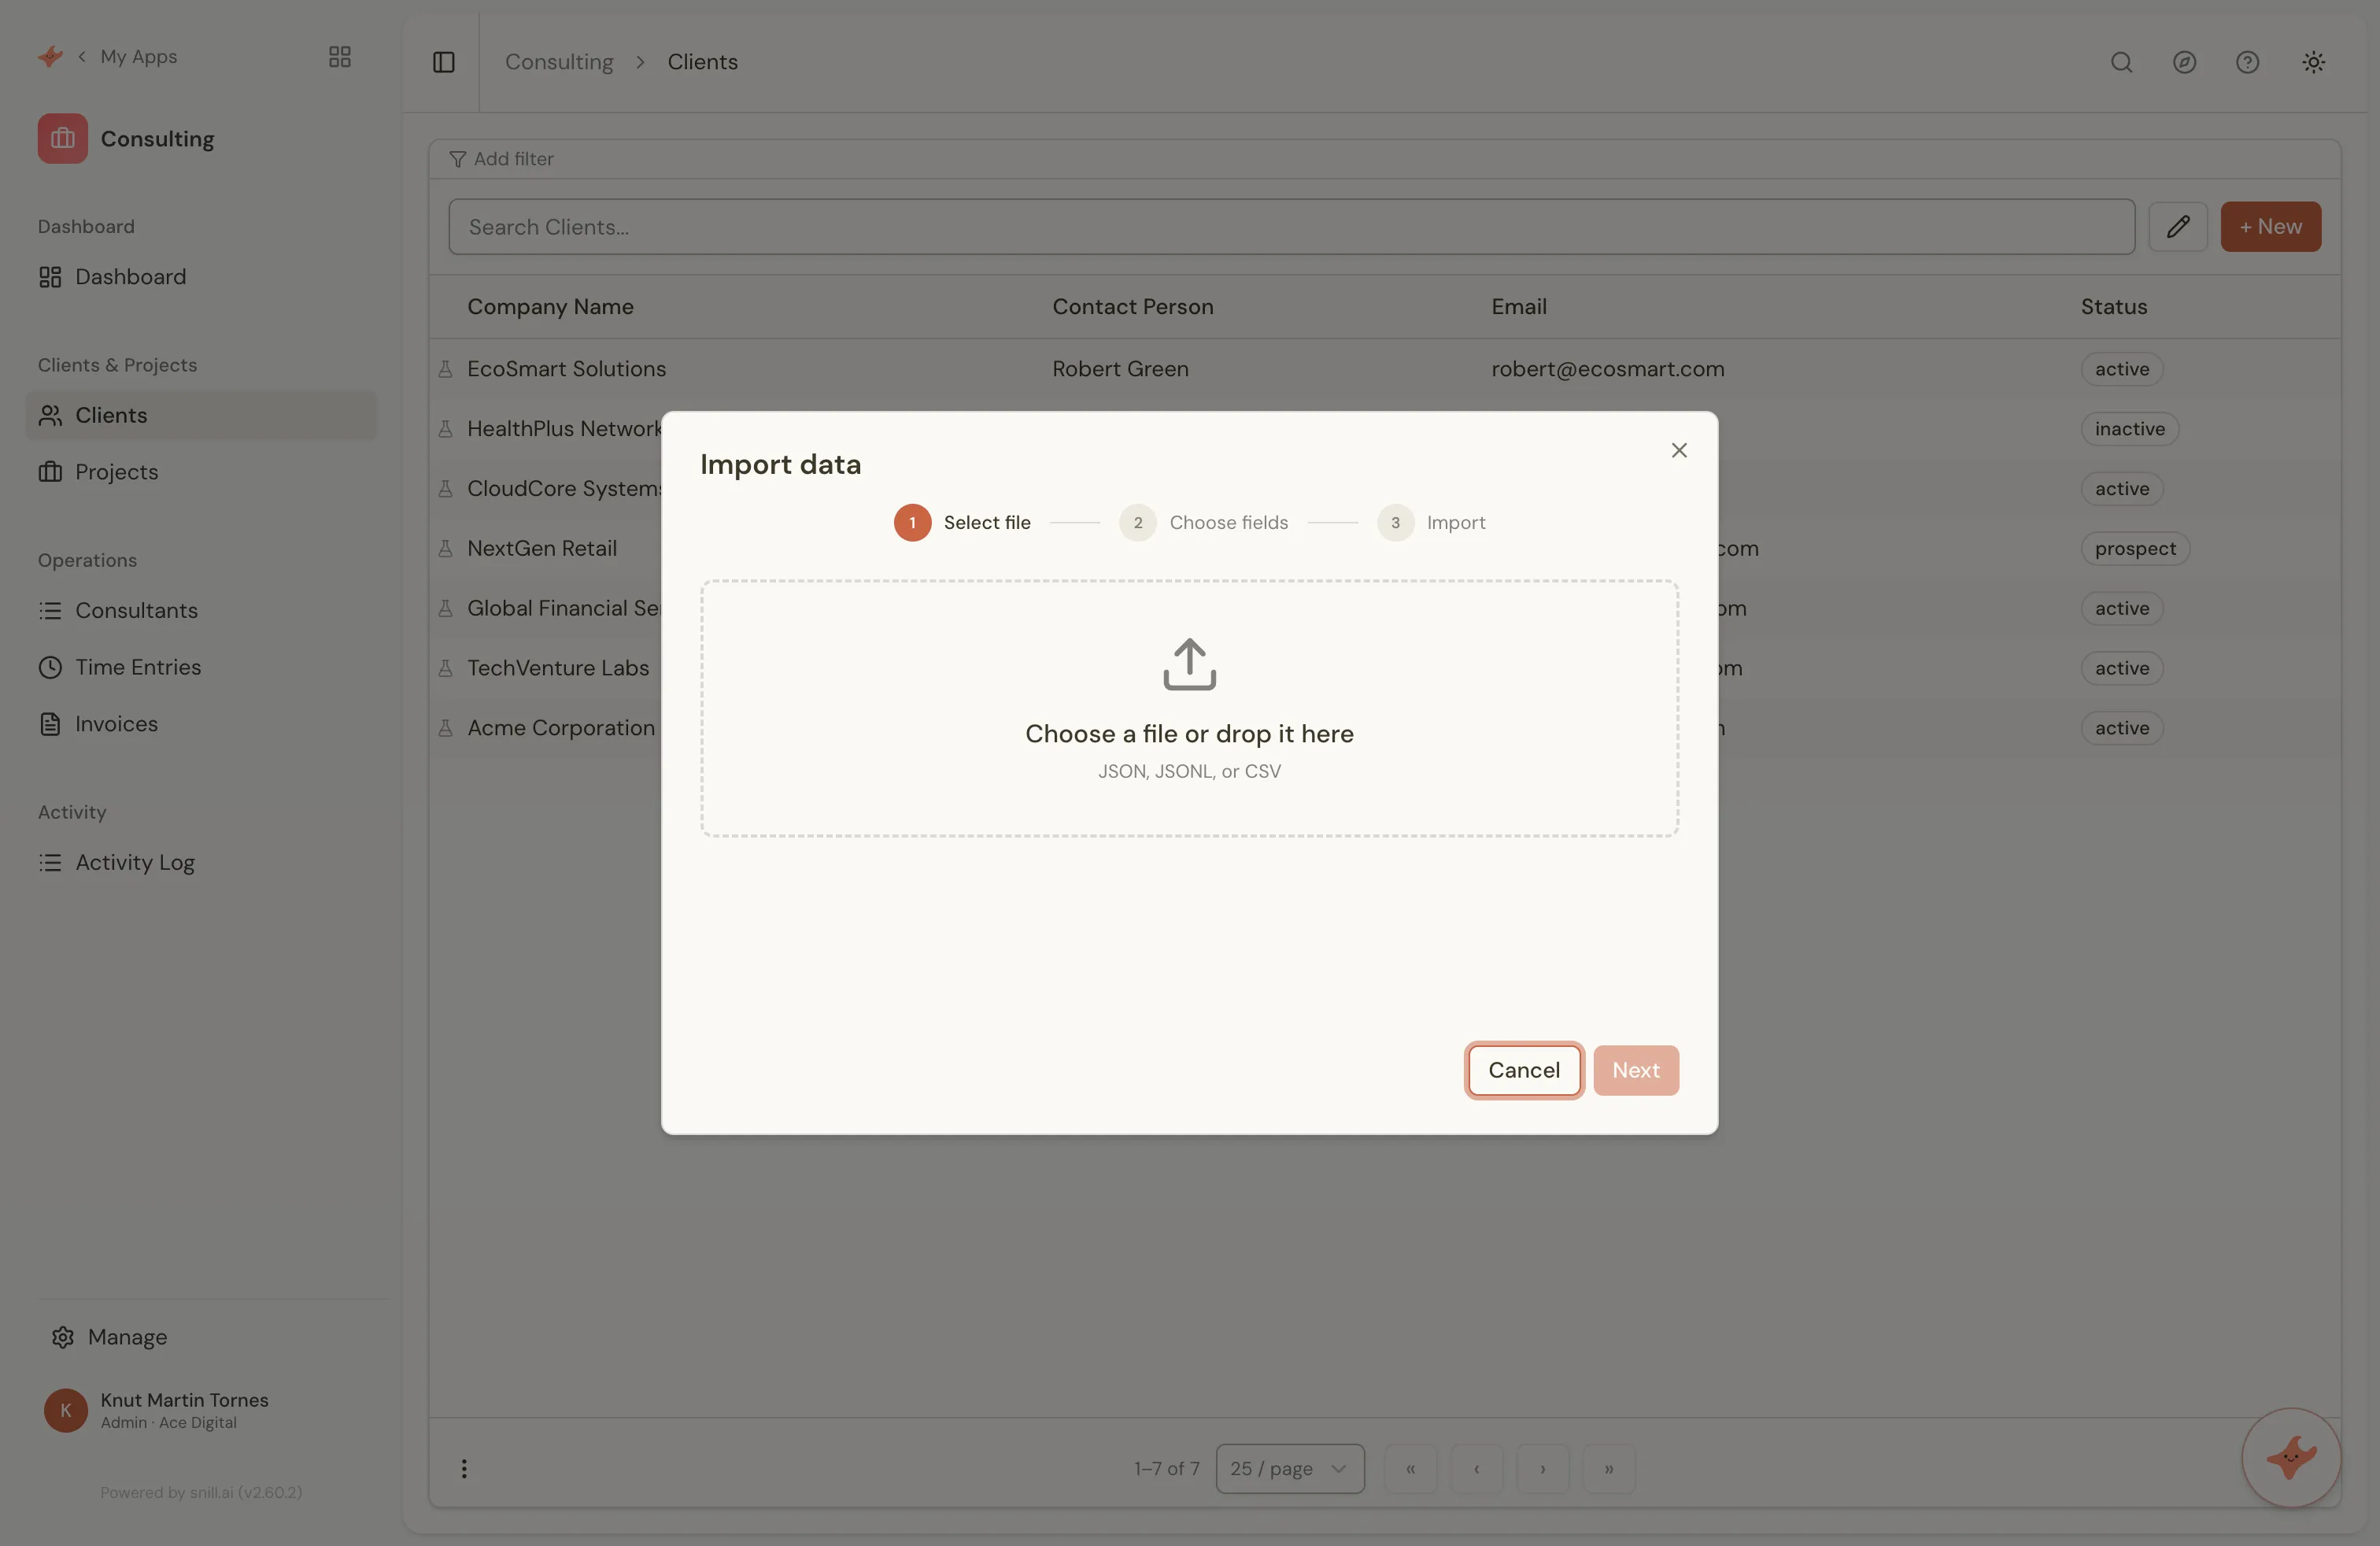
A few kinds of column need a second pass before the import is clean:
- Linked records export as text — the names of the referenced rows, not live references. Import your parent tables first (clients before projects, projects before invoices) so the targets exist, keep the name column, and verify the links resolved — reconnecting any that didn't.
- Formula columns export as static values. Skip any column you re-described as a calculated field in Step 2 — Snill recomputes it, so importing the old result would only fight the live one.
- Attachments export as links, not the files themselves. Plan to re-add images and documents to their file fields once the core data is in — usually a handful of contracts and logos, not thousands of rows.
Step 4 — Get back the parts you used to assemble
The pieces Airtable made you configure and keep in sync are generated here, from the same description:
- A REST API and webhooks — auto-generated from your data model with an OpenAPI spec and scoped keys, so whatever depended on your per-base API has something to point at. (See API & integrations.)
- Access control — say "only managers can see rates" and it's enforced, down to a single field, instead of hidden in a view. (See access control.)
- Dashboards — the numbers you rebuilt as views and interfaces are generated for your data and stay current. (See pages.)
What to check before you cut over
A migration is done when the new app tells the truth. Before you switch off Airtable:
- Record counts match per table, and a few spot-checked rows look right.
- Relationships resolve — open a client and its projects are actually linked, not just text.
- The logic agrees — a calculated total or a rule matches what your old formula produced.
- Attachments are re-added where they matter (see Step 3).
You don't have to cut over blind, either. Keep the Airtable base read-only for a week while people use the new app — and because every change to the app itself is versioned and reversible, tightening a rule or adding a field afterward is never a one-way door.
The shortcut: start from a template
If your base is a common shape — a CRM, a project tracker, an expense log — you can skip the blank start. Begin from a ready-made template, import your CSVs into it, and shape it by asking. (Coming from spreadsheets rather than Airtable? The same move from a spreadsheet works the same way.)
Moving off Airtable isn't a rebuild. It's an export, an import, and a description of the app you already run in your head.
Bring your Airtable data across → — it's free to start, and your data stays yours to export anytime.